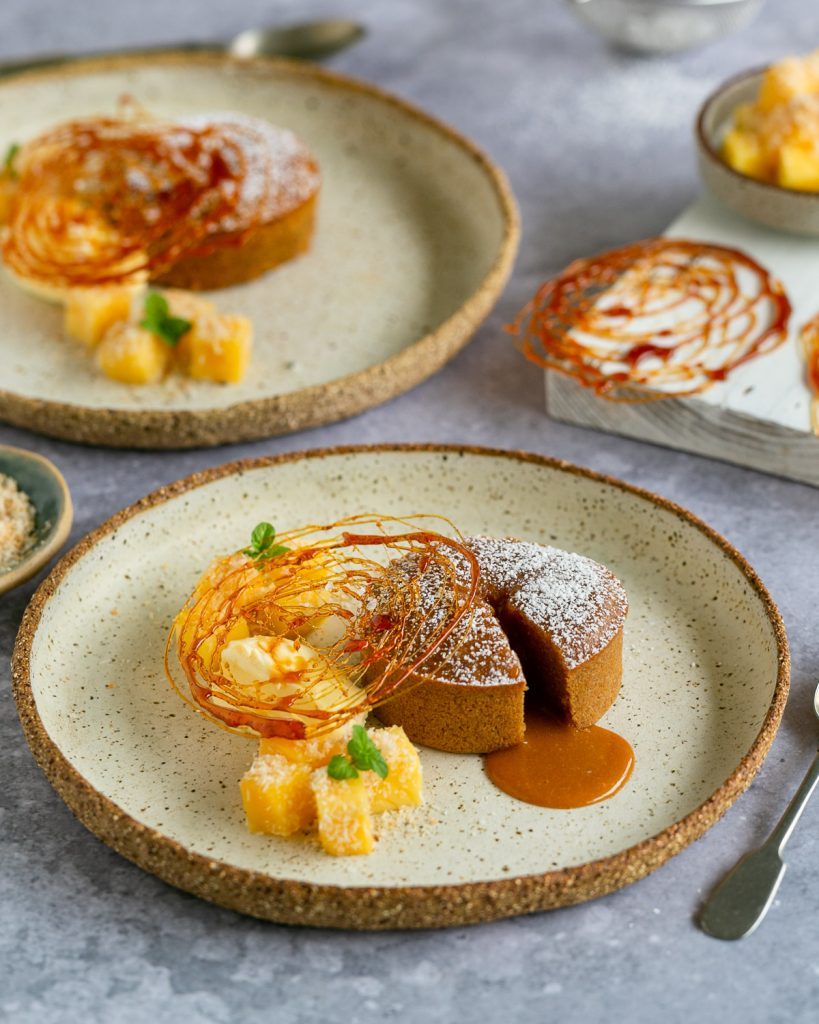
Paired with fresh mango, toasted coconut and creamy mascarpone, this salted caramel fondant makes a stunning dinner party dessert that is sure to impress your guests.
If you have had a chocolate fondant before, you might wonder what a caramel fondant tastes like. Or should we call it a lava cake? Well, it might not be as chocolaty rich but this salted caramel fondant has a deep, sweet salty flavour that grows on you with every bite.
The caramel fondant mixture can be whipped up ahead of time, making it a quick dessert to serve when entertaining. While the fondants are baking in the oven, you can use that time for plating up all the other components. And, if you are aiming for a fancy presentation, then we encourage you to tackle the caramel decorations too (they are fun to make!)
This recipe for a sticky-warm salted caramel cake, with a gooey centre, served with sweet mango-coconut dices and a quenelle of mascarpone on the side, garnished with a crispy caramel decoration, will have your guests salivating just listening to you announce the dessert!
WHAT YOU NEED TO MAKE THIS DESSERT
To make this recipe you need the following ingredients:
Caster sugar is the base of the caramel used for the fondant and the caramel decoration.
Butter to enrich the fondant cake and make it moist. Unsalted butter works best.
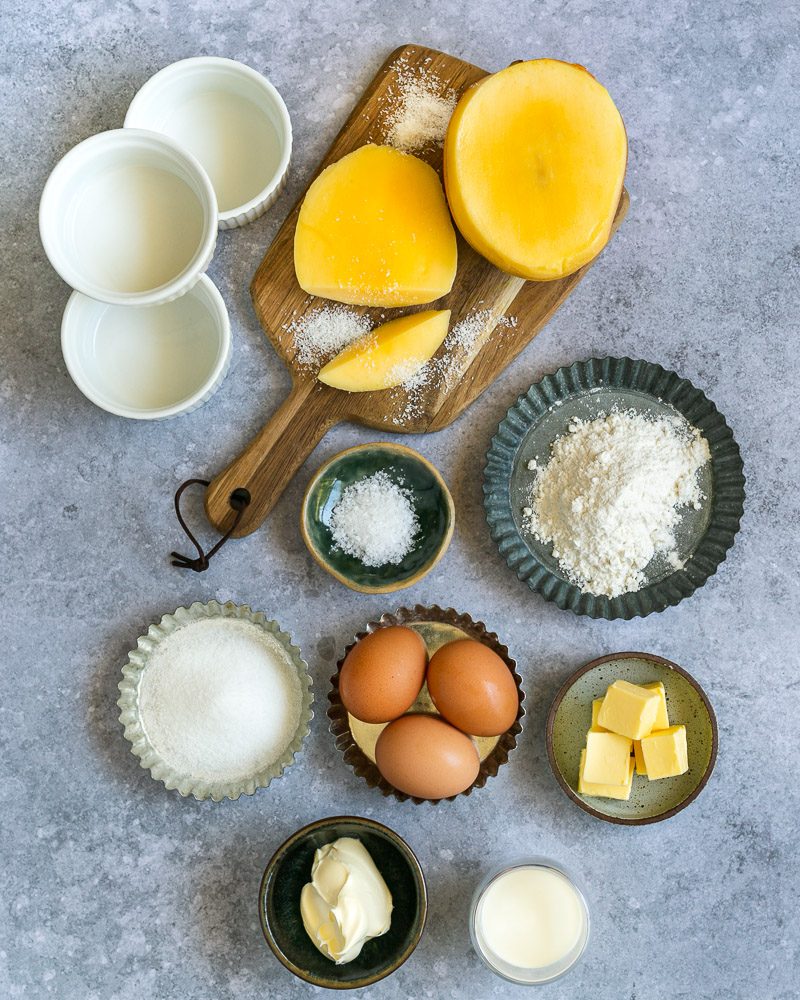
Cream is added to the caramel, to give a thick and gooey centre. Any heavy cream can be used, preferably pouring cream.
Whole Eggs are needed to give the fondant texture and body. Make sure the eggs are fresh as the runny centre will still contain raw eggs.
Flour to make the cake hold together. This recipe requires all purpose flour.
Sea salt is added to the caramel for that sweet-salty balance.
Mango is part of the decoration. While mango goes well with the fondant it can be replaced with other fruits if not in season. Orange, strawberry or pineapple are few options.
Desiccated coconut is used to season the fresh mango with.
Mascarpone, this Italian cream cheese pairs beautifully with the caramel fondant cake. A possible substitute would be, double cream or whipped cream.
STEPS FOR MAKING THIS DESSERT
The dessert is broken down into four steps.
- The first step is to make the recipe for salted caramel
- The next step is how to make the caramel fondant cake.
- Then we need to prepare the caramel decoration.
- Lastly we need to prepare the garnishes for the plate up.
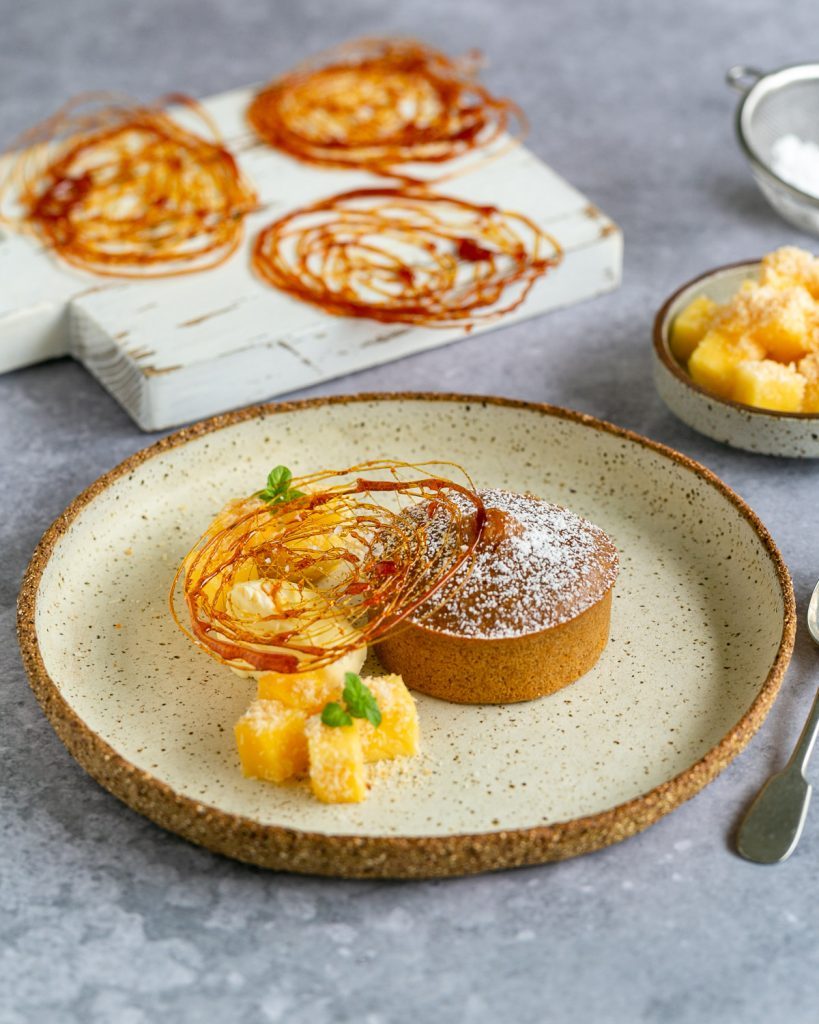
All the steps above can be prepared ahead of time and don't require special skills.
RECIPE FOR SALTED CARAMEL
The key to making the caramel fondant is the caramel. You want to get that deep, dark colour before adding the butter and cream. The recipe for salted caramel is as well the first step.
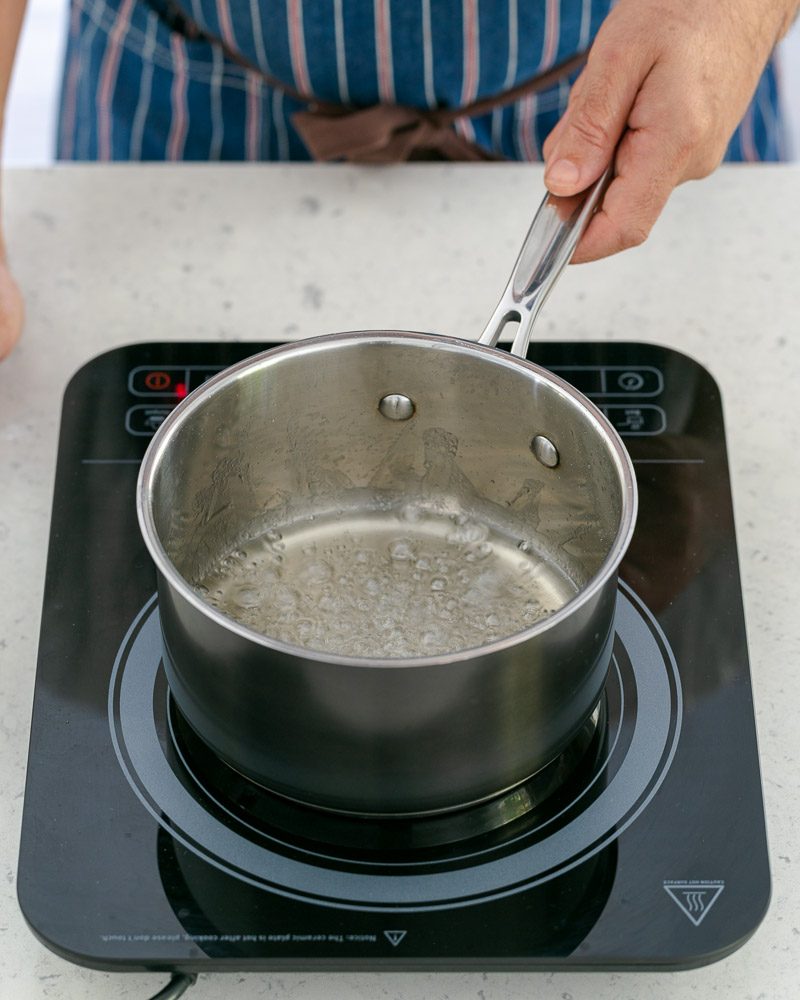
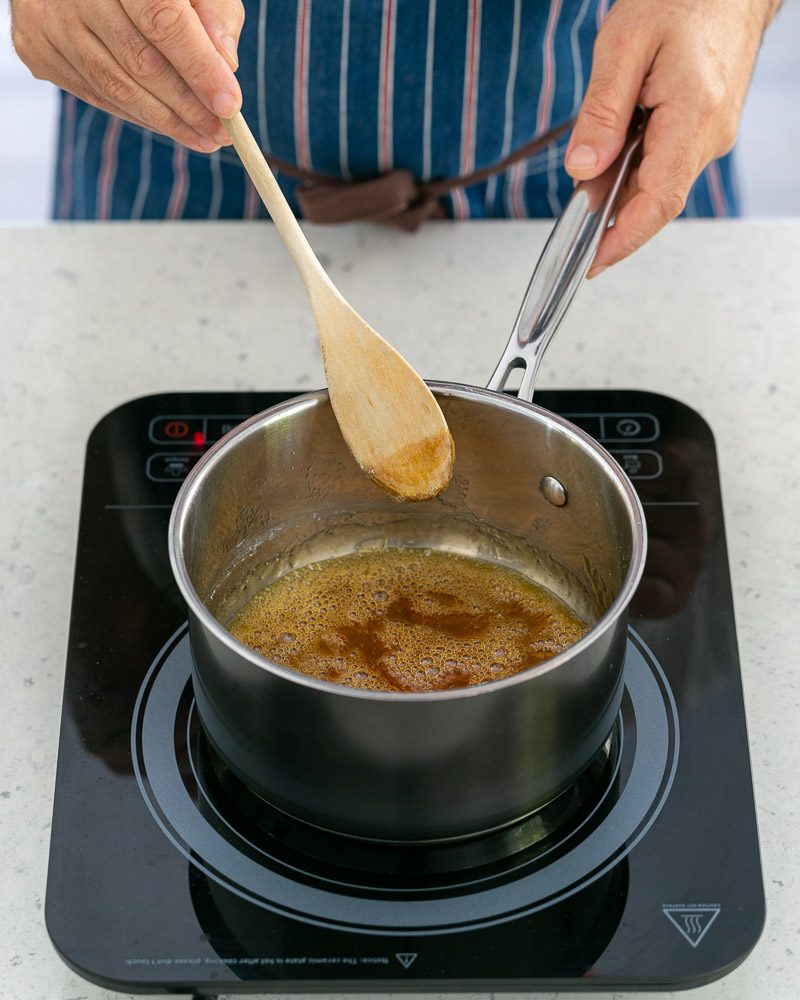
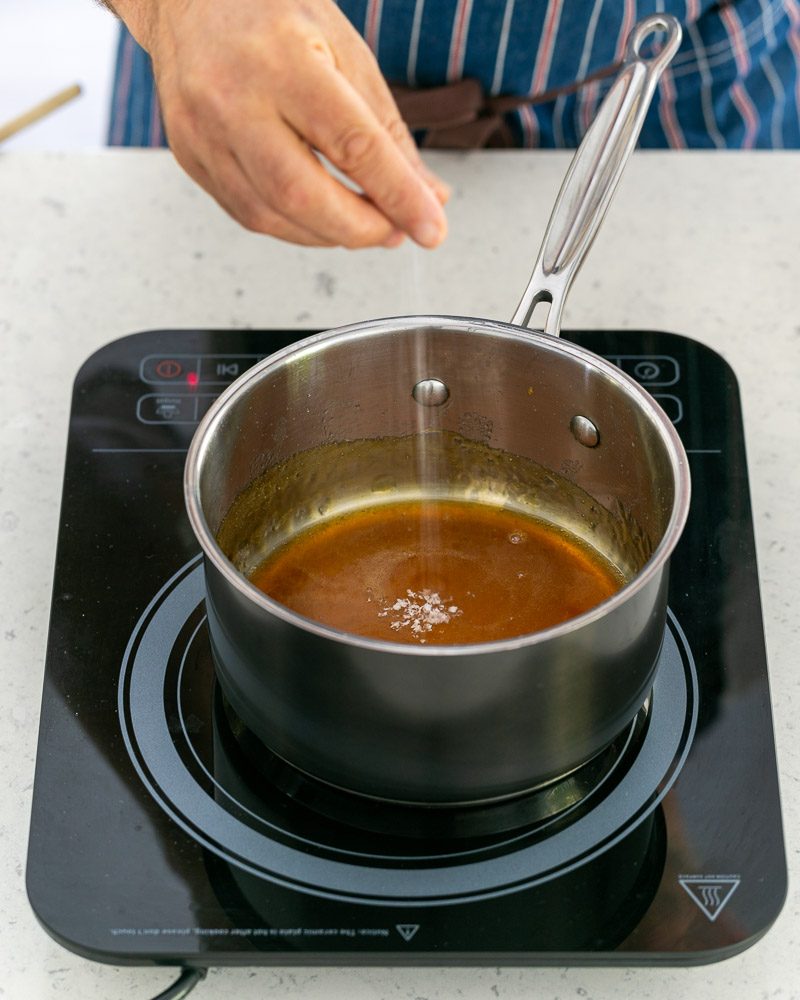
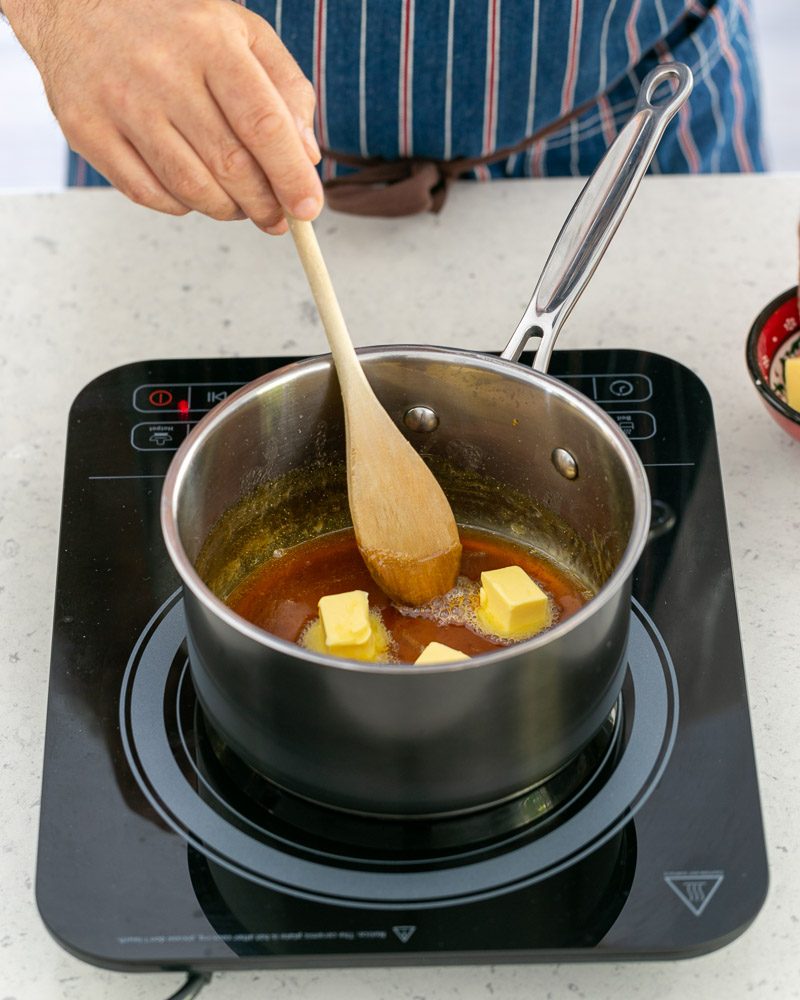
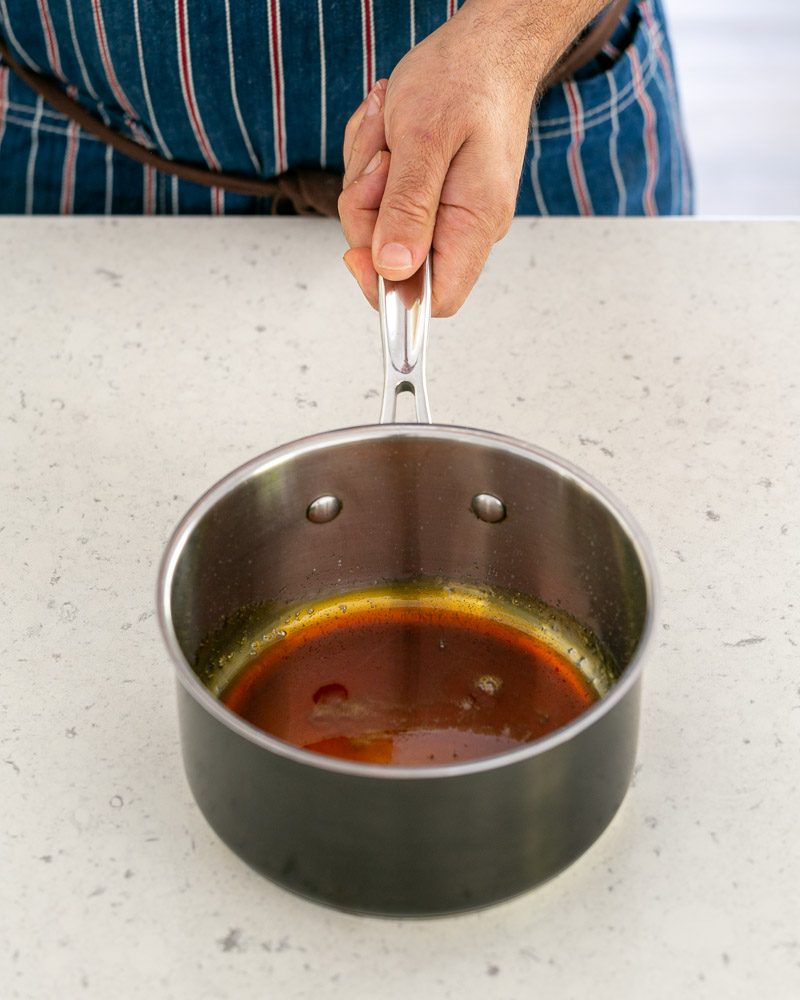
In a heavy bottom pan combine the sugar with water and bring to a simmer on medium heat. Watch the bubbles form and the sugar taking on colour. Once the sugar has turned to caramel, it will reach a dark amber colour, at this point, add sea salt. Now be ready for the most important steps!
Quickly, reduce the heat to low, to avoid burning the caramel and immediately stir in the butter being very careful not to burn yourself.
HOW TO MAKE A CARAMEL FONDANT
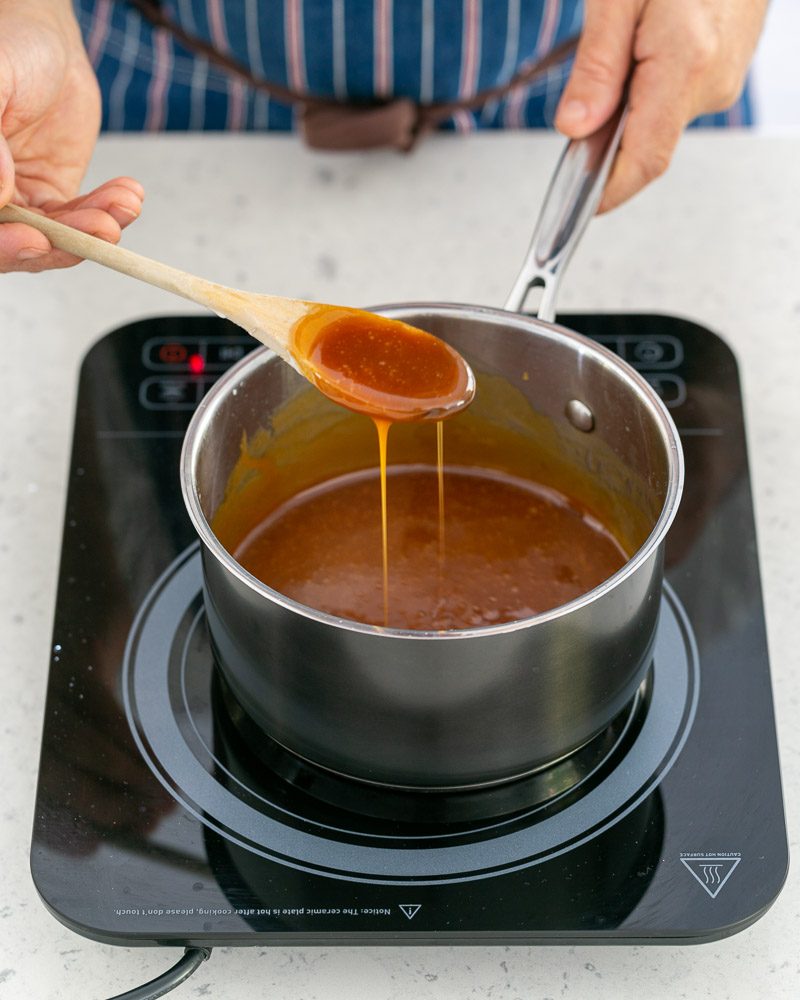
Now add the cream and stir well. Cook for another 3-4 minutes, allow it to cool down to a lukewarm temperature. Keep a tablespoon of the caramel sauce on the side as you might want to garnish the plate with it.
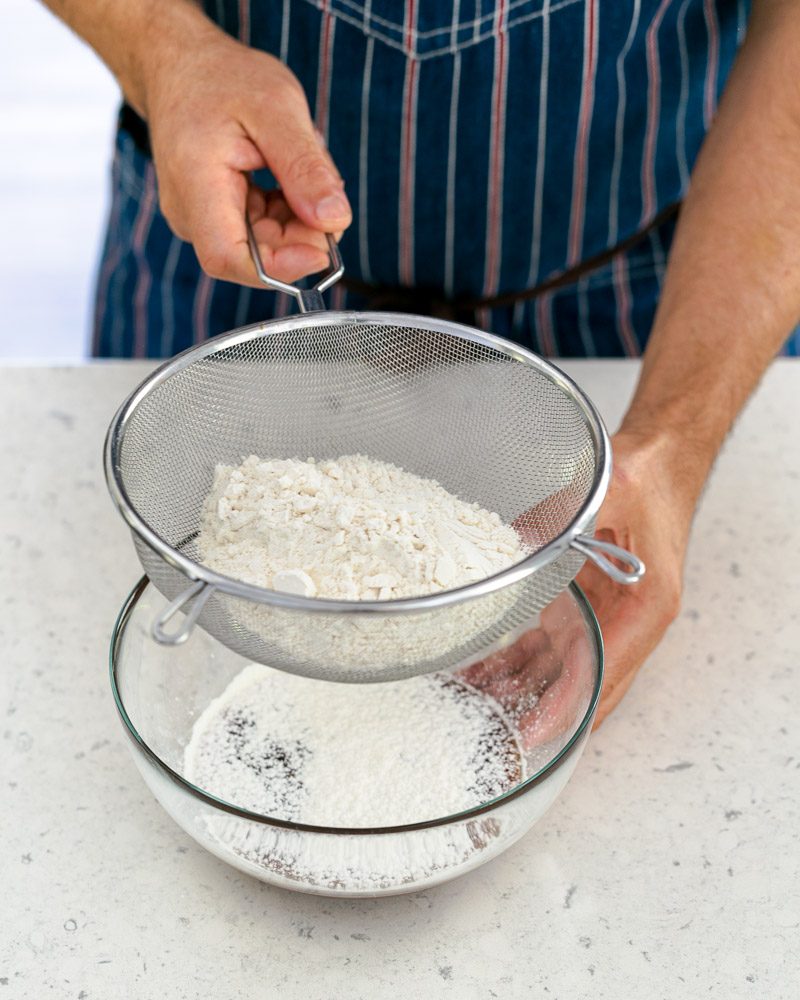
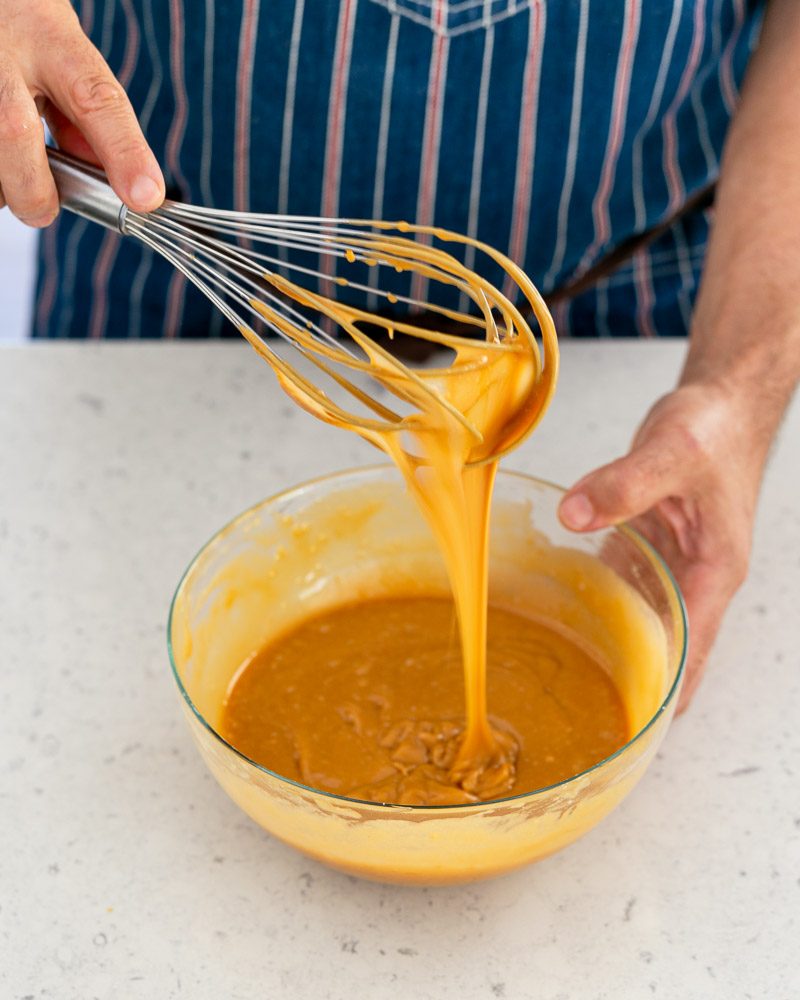
With the caramel now ready, all we need to do is add the remaining ingredients. Start with sifting flour into the caramel and mix with a wooden spoon. Next add the beaten eggs and mix well using a whisk. Place the fondant batter in a jug and keep aside.
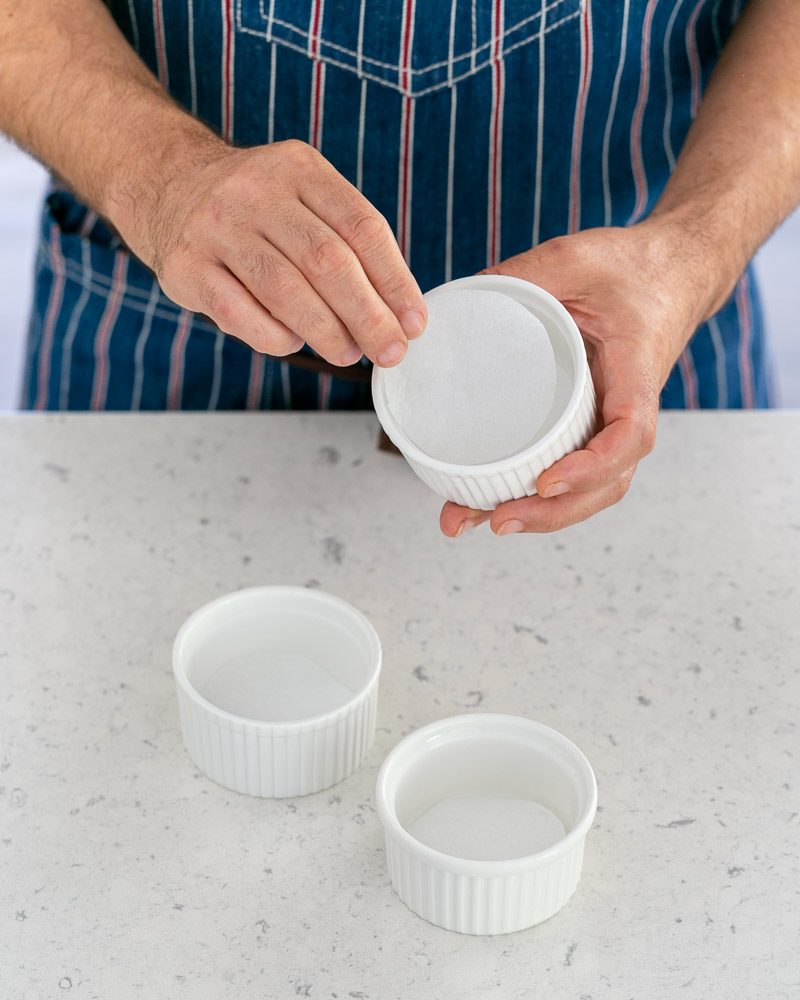
Caramel fondants are sometimes tricky to remove from the ramekins as they tend to stick on the bottom. To avoid this, cut a circle from parchment paper and place on the bottom of the ramekins.
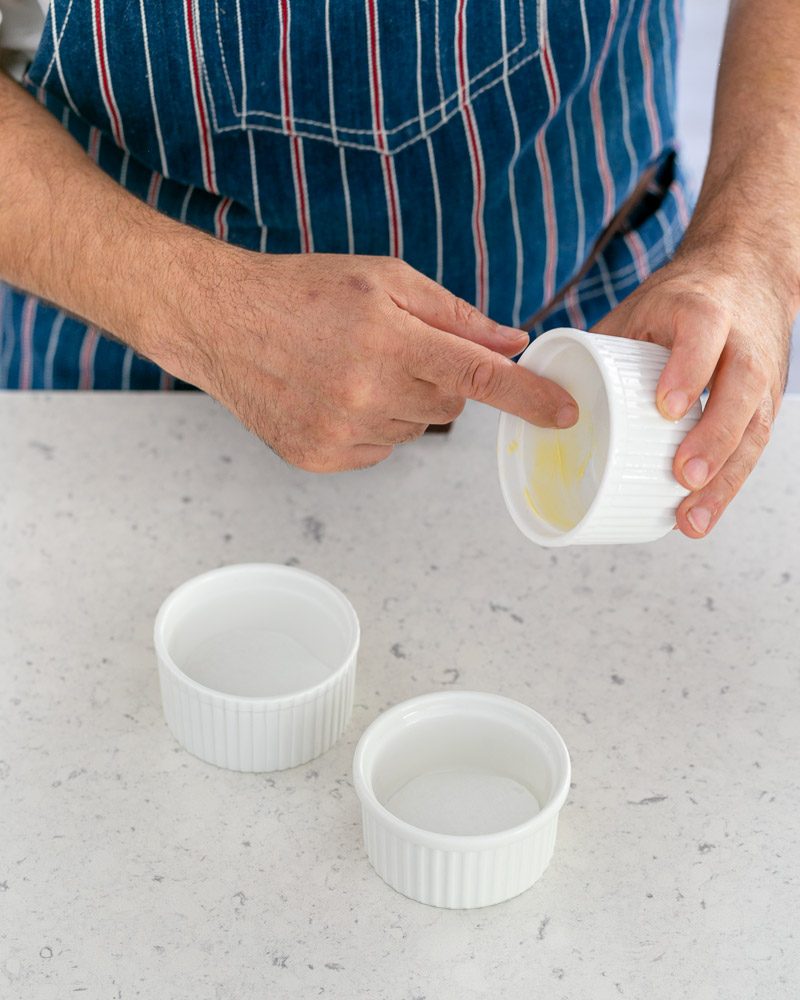
Now butter the sides of the ramekins and fill the mixture to ¾ quarter height.
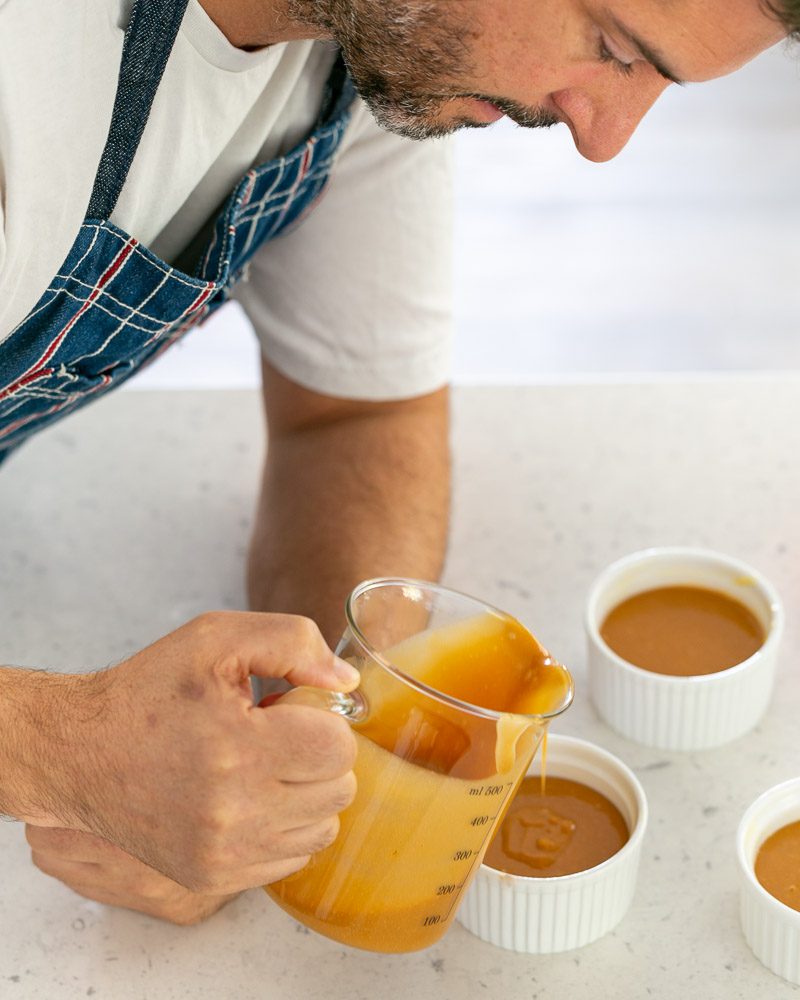
Cook the caramel fondants at 180°C (375°F) for 16 minutes for a molten centre. Remove the ramekins from the oven and place on a cool kitchen surface.
Wait for a few minutes, then using a small knife go around the sides of the fondant loosening it from the ramekin. Tip each fondant onto your hand or onto a plate directly - they should easily come out.
AS A TIP: The centre of the caramel fondant can taste a bit floury so it might not be everyone's taste. To avoid that, you can cook the fondant for another 2 minutes. Don't worry you won't overcook it - the centre will still be moist and resemble a sticky toffee pudding!
HOW TO MAKE CARAMEL DECORATIONS
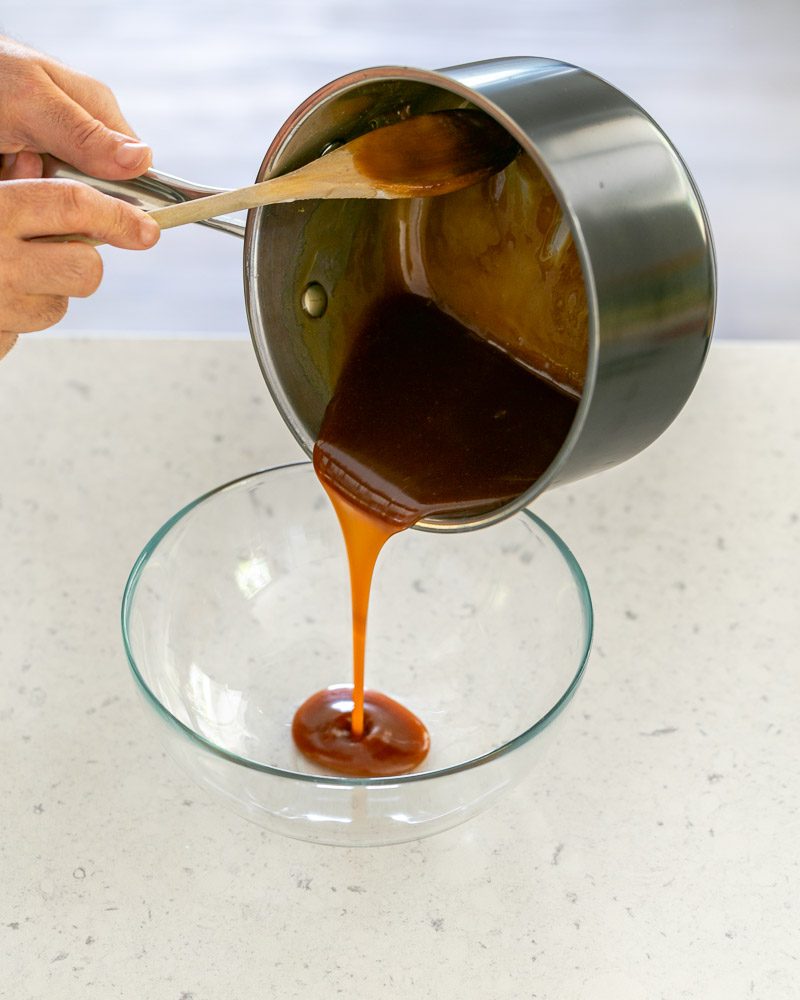
The caramel decoration is optional but it makes for a stunning presentation, plus it adds a crispy texture. Simply melt sugar and water in a pan and reduce to a caramel. Once the caramel has reached it's dark amber colour, set aside and let it cool.
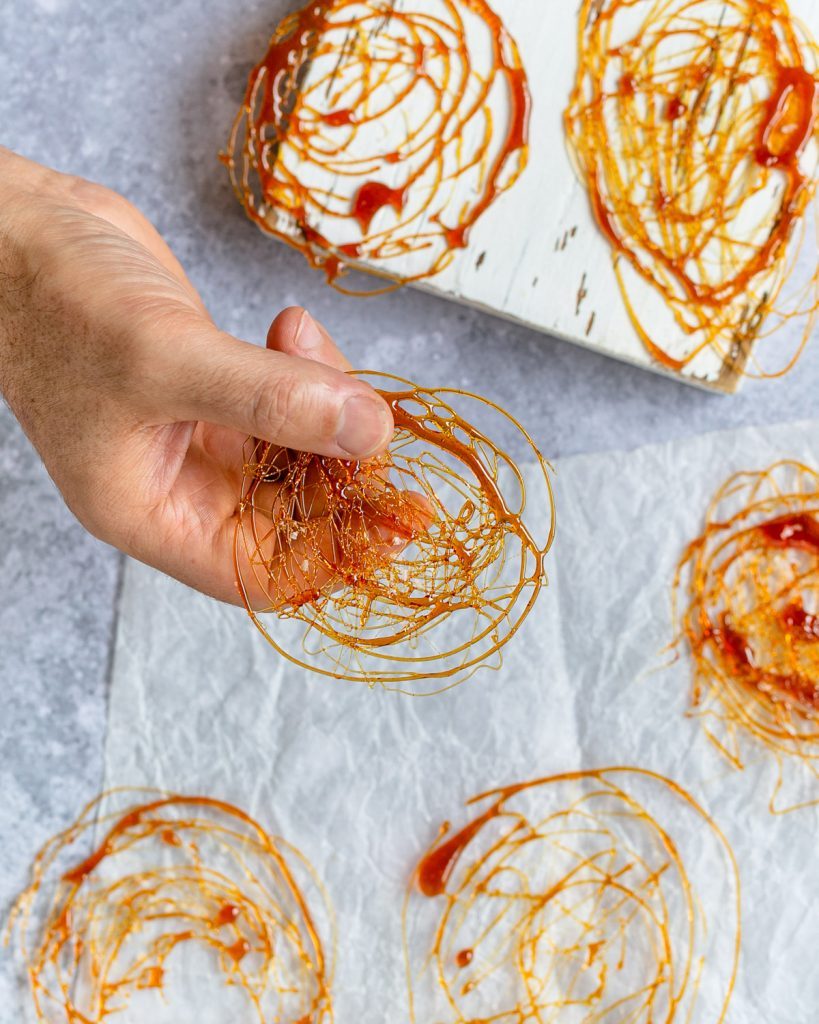
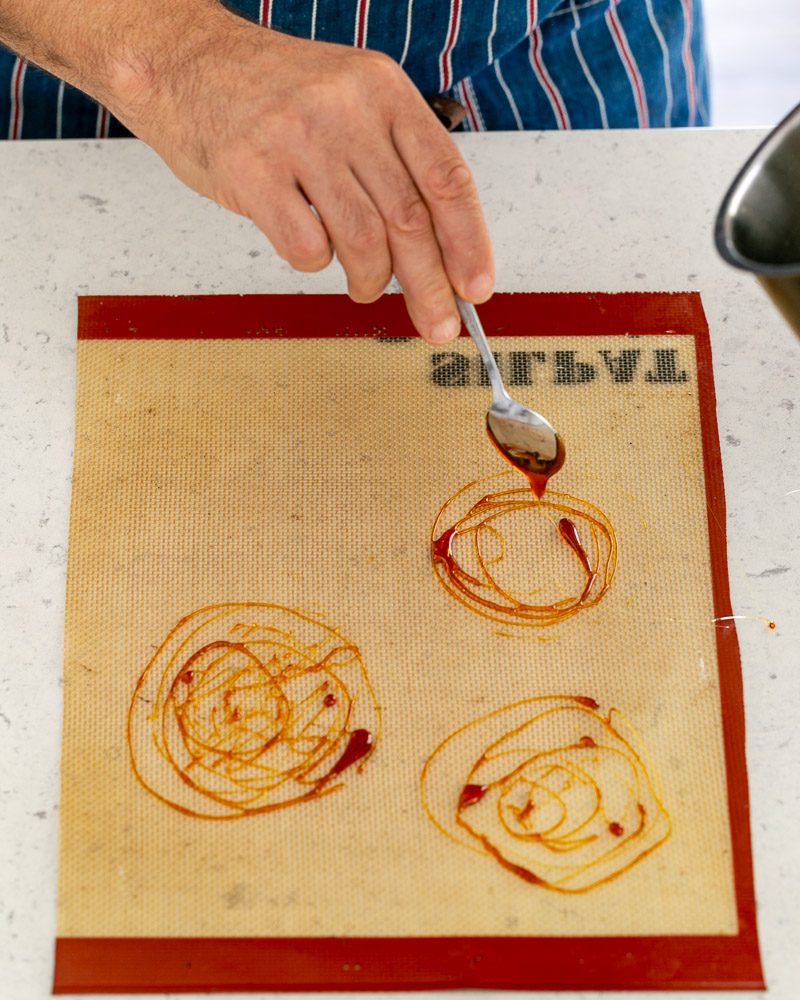
Prepare a tray with a baking mat or parchment paper. Use the back of a wooden spoon and dip into the caramel. Now swirl the caramel strands, running down from the spoon and drizzle it onto the sheet creating any shape you like- zig zags, spirals, whatever your heart pleases!
Let your decorations cool before removing from the sheet. Be careful not to break them. The caramel decorations can be kept in an airtight container for up to 5 days.
GARNISHING THE PLATE
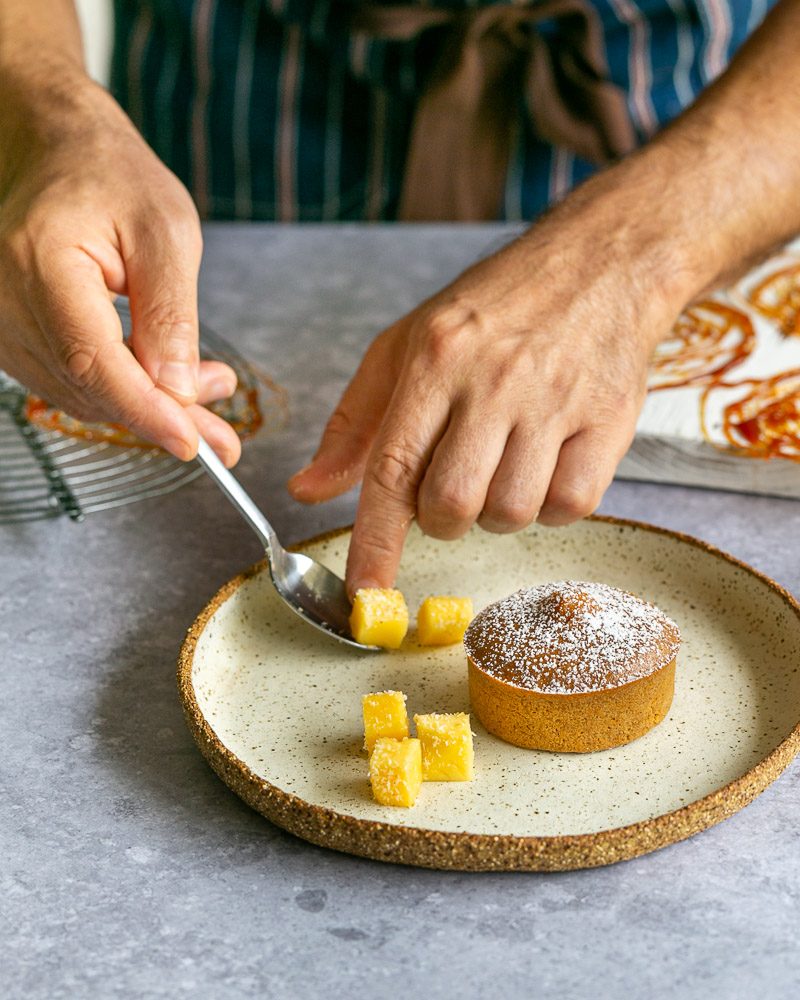
For the garnish, peel the mango and cut into even cubes. Toast the desiccated coconut in a dry pan on low heat. When you are ready for plating up, toss the mango cubes in the toasted coconut.
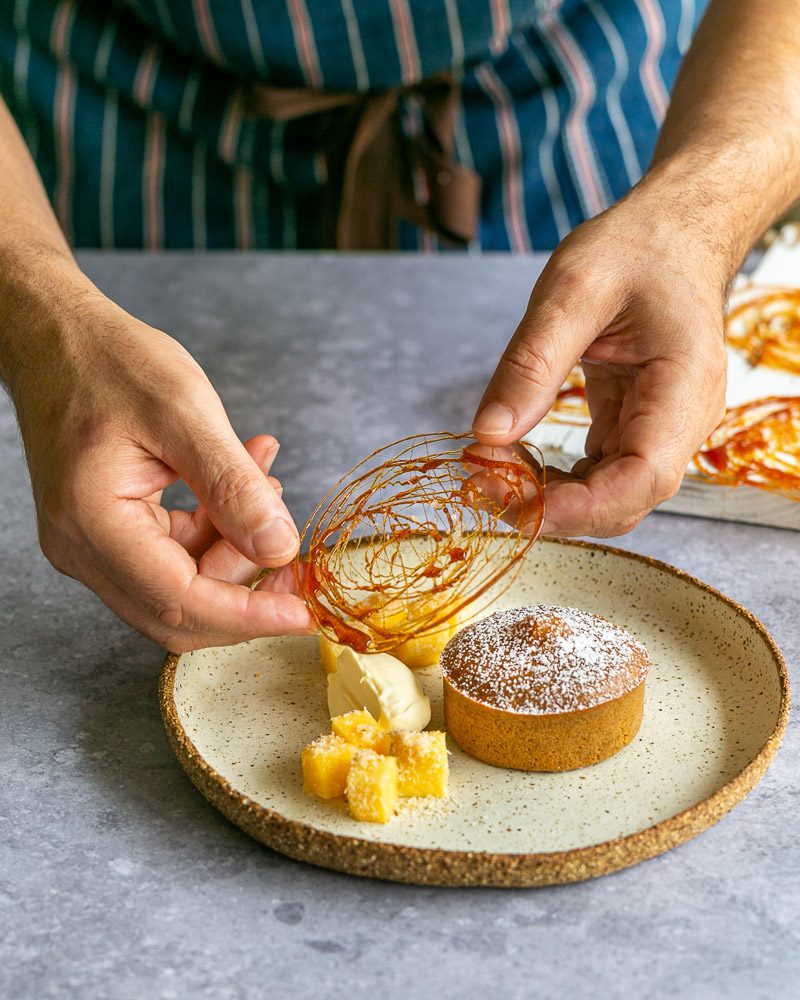
If you are making this dessert for a dinner party, you can plate up all the ingredients in advance and add the caramel fondant just before serving. I started with the fondant first so that I could show you how to plate up this dessert, just like in a restaurant!
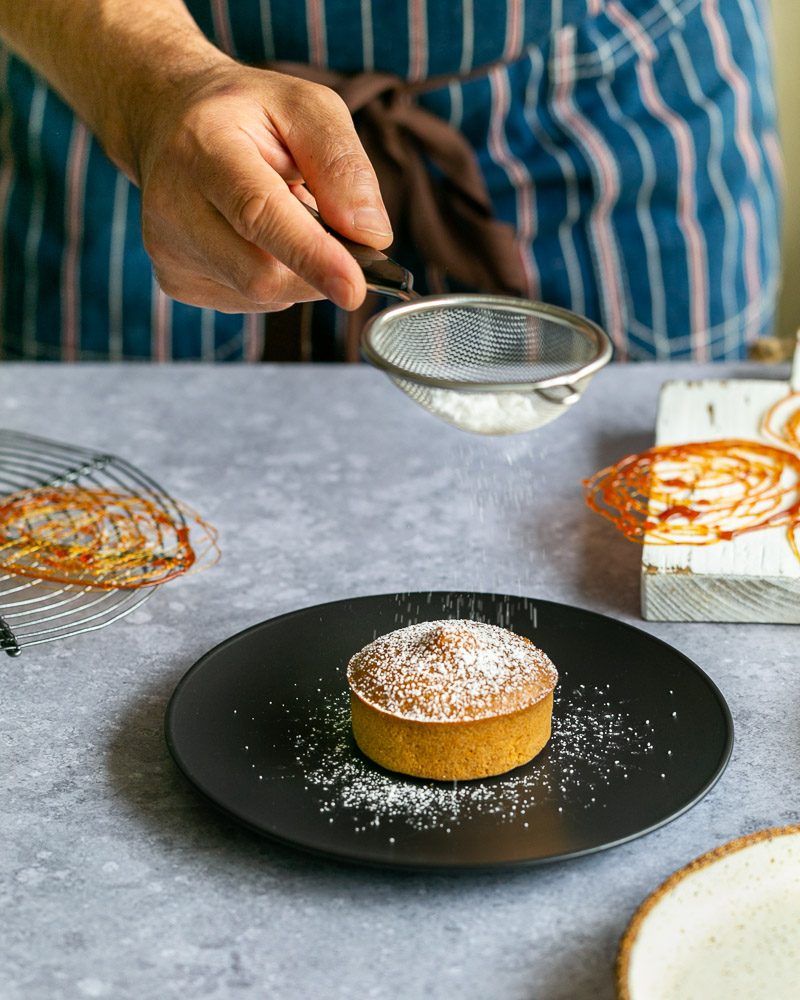
Sprinkle the fondant with icing sugar and place on a dessert plate. Add a few mango cubes around the plate.
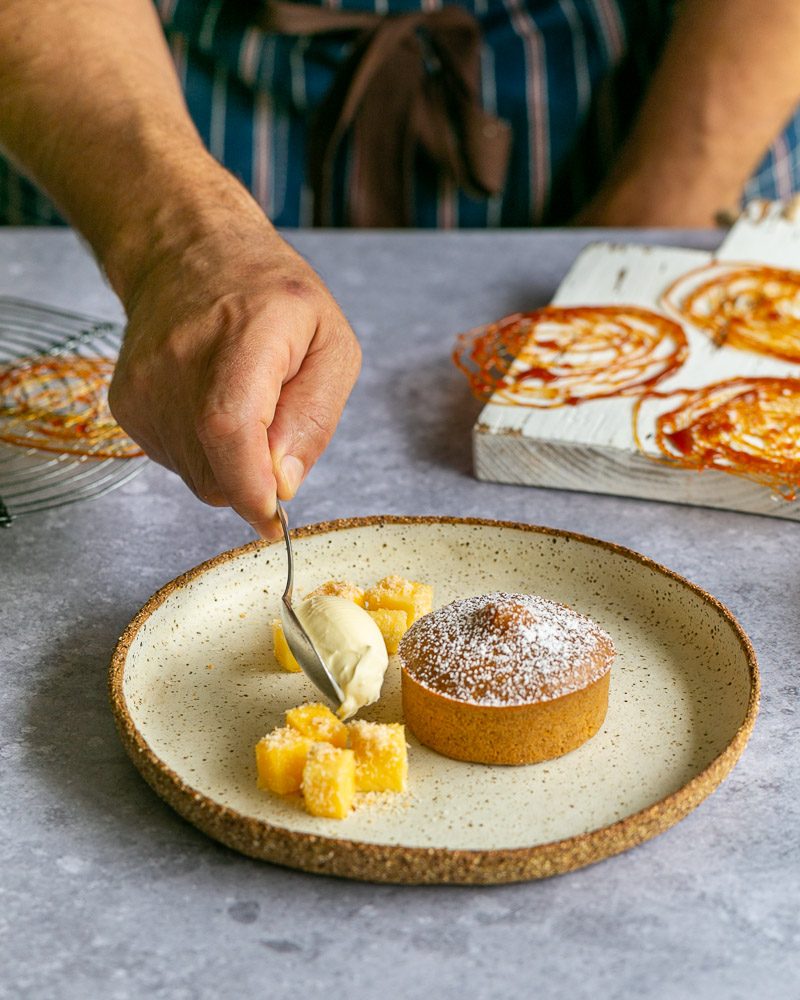
Then a spoon of the mascarpone close to the fondant and to finish the plate up, we place the caramel decoration gently on top.
Decorate with fresh mint leaves (optional) and serve!
FAQ'S
Is this dessert suitable for pregnant women?
If the cooking time is followed as per the recipe, the centre will be runny and contain un-cooked eggs. Hence this dessert might not be suitable for pregnant women. To make it safe, cook the fondant for 5 more minutes until cooked through - promise it will still be delicious!
how long can I keep this dessert in the fridge for?
The salted caramel fondant batter, can be made well ahead and kept in the fridge for 3 days. Take out the fondant batter from the fridge atleast half an hour before baking.
Check if the fondant has cooked after 16 minutes are up by gently tapping the centre. If it feels too wet, then give it another minute or two as the centre might have been too cold.
RECIPES WITH CARAMEL
Are you a fan of everything caramel? If your answer was a loud and clear yes! Then you must check out these recipes.
Dulce de Leche with puff pastry, banana and whipped cream
French ile flottante with homemade vanilla sauce
Caramel custard with poached pear
For your next dinner party, instead of an ooey-gooey Chocolate Fondant, how about you serve this Salted Caramel Fondant! We are pretty sure your guests will be impressed both with your creativity and your plating skills!
I can already hear compliments and praises coming your way so be sure to tell us all about it by
leaving a comment below😉

Salted Caramel Fondant Cake with Mango
Equipment
- heavy bottom pan
- whisk
- sieve
- baking mat or parchment paper
- ramekins
Ingredients
for the caramel fondant
- 150 gram caster sugar
- 60 milliliter water
- 90 gram unsalted butter + one teaspoon for the ramekins
- 75 gram heavy cream
- 4 whole eggs
- 135 gram all purpose flour
for the caramel decoration
- 100 gram caster sugar
- 60 milliliter water
for the garnish
- 1 ripe mango
- 1 teaspoon desiccated coconut
- 4 tablespoon mascarpone
- mint leaves (optional)
Instructions
for the caramel fondant
- In a heavy bottom pan, combine sugar with water and bring to a simmer on medium heat. Watch the bubbles form and the sugar taking on colour.
- Once the sugar has turned to caramel and has reached a dark amber colour add the sea salt. Now, quickly reduce the heat to low to avoid burning the caramel and immediately stir in the butter being very careful not to burn yourself.
- Now add the cream and stir well and cook for another 3-4 minutes. Allow it to cool down to a lukewarm temperature. Keep a tablespoon of the caramel sauce on the side as you might want to garnish the plate with it.
- Now add the sifted flour and beaten eggs to the caramel and mix well with a whisk. Pour the fondant batter into a jug and keep aside
- To avoid the fondant sticking to the bottom, cut a circle from parchment paper and place on the bottom of the ramekins. Now butter the sides of the ramekins and fill the mixture to ¾ quarter height.
- Cook the caramel fondant at 180°C (375°F) for 16 minutes for a molten centre. Remove the ramekins from the oven and place on a cool kitchen surface.
- Wait for a few minutes before using a small knife to go around the sides of the ramekin. Tip each fondant onto your hand or directly onto a plate, they should come out easily.
for the caramel decoration
- Melt the sugar and water in a pan and reduce to a caramel. Once the caramel has reached it's dark amber colour, set aside to cool.
- Prepare a tray with a baking mat or parchment paper. Use the back of a wooden spoon and dip into the caramel. Now swirl the caramel strands running down the spoon and drizzle onto the sheet creating any shape you like - zig zags, spirals you name it.
- Let the decorations cool down before removing from the sheet. Be careful not to break them. The caramel decorations can be kept in an airtight container for up to 5 days.
for the garnish
- For the garnish, peel the mango and cut into even cubes. Toast the desiccated coconut in a dry pan on low heat. When you are ready for plating up, toss the mango cubes in the toasted coconut.
- Sprinkle the caramel fondant with icing sugar and then place on a dessert plate. Decorate with the mango cubes and add a spoon of the mascarpone. Garnish with mint leaves (optional) and the caramel decoration.



Renu
Easy to follow recipe. Love it !
Shilpi & Etienne
Thanks Renu! Glad you found the recipe easy to follow!
Lucette
Delicious!
Shilpi & Etienne
Thank you Lucette!